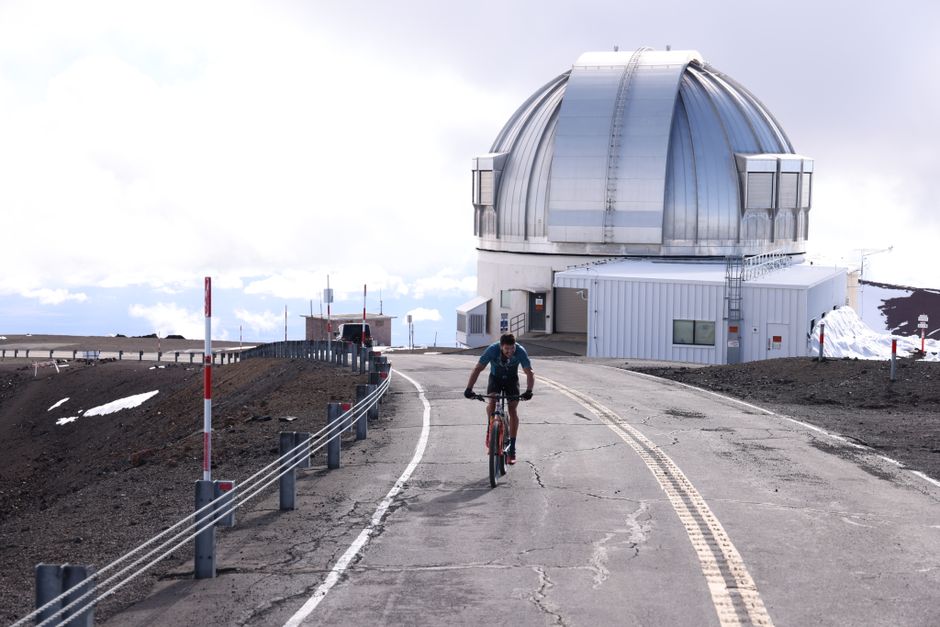
If you are planning on driving to Mauna Kea summit in 2026, you need more than just a rental car reservation. You need a clear understanding of what makes this road unlike any other in Hawaii, a vehicle that can actually handle the climb, and a realistic plan for the altitude that will hit your body the moment you step out of the car at 13,800 feet. This guide is built to bridge the gap between "I want to go" and "I know exactly how to get there and back safely." We will walk through every requirement, every rule, and every practical step, from the moment you leave your hotel in Kona, Hilo, or Waimea to the moment you return with sunset photos and a story worth telling. By the time you finish this guide, you will know exactly what vehicle to rent, when to leave, what to pack, and how to avoid the three most common mistakes that ruin summit trips.
Table of Contents
- Why the Drive to Mauna Kea Summit Is Different from Any Other Road in Hawaii
- Vehicle Requirements: Can Your Rental Car Make It?
- Step-by-Step Route and Timing: From Kona, Hilo, or Waimea
- Altitude Sickness: Symptoms, Prevention, and When to Turn Back
- What to Pack for the Mauna Kea Summit Drive
- Rules, Regulations, and Cultural Respect
- Self-Drive vs. Guided Tour: Which Is Right for You?
- Seasonal Guide: Best Months to Drive to Mauna Kea Summit
- Frequently Asked Questions About Driving to Mauna Kea Summit
Why the Drive to Mauna Kea Summit Is Different from Any Other Road in Hawaii
Hawaii is full of memorable drives. The Road to Hana on Maui winds through rainforests and waterfalls. The coastal highway on Oahu hugs cliffs with ocean views. Driving to Mauna Kea summit shares almost nothing with those experiences. This is not a leisurely scenic route. It is a high-altitude expedition that begins at sea level and ends in an environment closer to Mars than to any tropical beach.

The summit sits at over 13,800 feet above sea level, making Mauna Kea the tallest volcano on Earth when measured from the ocean floor. The Visitor Information Station, known as the VIS, sits at 9,200 feet. From there, the final 8-mile stretch to the summit gains nearly 5,000 vertical feet. That is steeper than any paved road on the Big Island, and large portions of it are unpaved, single-lane gravel with no guardrails. The air at the summit contains 40 percent less oxygen than at sea level, which means your body is working harder just to function, let alone navigate a challenging road.
This is not a drive where you roll down the windows and cruise. It demands focus, preparation, and respect. The reward is standing on the highest point in the Pacific, watching the sun sink below the clouds from above the clouds. But getting there safely requires understanding exactly what you are signing up for.
Vehicle Requirements: Can Your Rental Car Make It?
The 4WD/AWD Mandate (No Exceptions)
The rule at the Mauna Kea Access Road is absolute. Only dependable, fully-operable 4WD or AWD vehicles are permitted past the Visitor Information Station. Rangers check vehicles at the VIS, and if you show up in a 2WD sedan, minivan, or crossover without true four-wheel drive capability, you will be turned back. No exceptions, no negotiation, no "but we drove all the way from Kona."
The rental vehicles most suited to this drive are Jeep Wranglers, Toyota 4Runners, or similar high-clearance SUVs with a genuine low-range transfer case. All-wheel-drive crossovers may pass the ranger check, but know that AWD is not the same as 4WD with low range, and you will feel the difference on the descent.
Before you even pick up your rental, read the contract. Some rental companies on the Big Island explicitly prohibit driving to the Mauna Kea summit in their terms and conditions. This is not universal, but it is common enough that you need to verify before you leave the lot. A quick call to the rental desk or a careful read of the fine print can save you from a voided insurance policy or a hefty penalty.

The "Half-Tank Rule" and What It Means
When you arrive at the VIS, a ranger will check your fuel gauge. If your tank is below half, you will be denied access to the summit road. This rule exists for good reason. Idling during the mandatory 30-minute acclimation stop, crawling uphill in low-range 4WD, and running the heater against summit cold all consume fuel at a rate far higher than normal highway driving. You do not want to run out of gas at 12,000 feet on a single-lane gravel road with no cell service.
Fill up at the last available gas station before you head uphill. If you are coming from Waimea, top off at one of the stations along Highway 19. If you are coming from Hilo, fill up before you get on Highway 200, the Saddle Road. Do not assume you will find a station closer to the access road. You will not.
Why You Need 4LO (Low Range) for the Descent
The single most dangerous part of driving to Mauna Kea summit is not the climb. It is the descent. Gravity wants to pull your vehicle down 5,000 vertical feet in 8 miles, and if you ride your brakes the whole way, they will overheat. Brake fade on a steep, unpaved road with no guardrails is not a theoretical risk. It happens, and it has caused accidents on this mountain.
The solution is to use 4LO, or low-range four-wheel drive, combined with manual gear selection. Shift into 4LO before you start descending, then put the transmission in manual gear 2. This engages engine braking, which uses the resistance of the engine to control your speed without relying on the brake pedal. One ranger at the VIS put it to a driver this way: "Use 4LO for ascent and manual gear 2 for descent." That single sentence, delivered at 9,200 feet, is the most actionable safety advice you will receive on the mountain. Follow it.
If you ignore this and ride your brakes, you will smell them overheating before you lose them. If you lose them, there is no runaway truck ramp, no guardrail, and no easy way to stop. Use engine braking. Let the transmission do the work.
Step-by-Step Route and Timing: From Kona, Hilo, or Waimea
Starting Point Comparison (Kona vs. Hilo vs. Waimea)
Your departure city determines your timeline. From Kona, the drive to the VIS takes roughly 90 to 120 minutes. If you are aiming for sunset at the summit, you need to leave Kona by noon at the latest. This gives you time for the drive, the mandatory 30-minute acclimation stop, and the slow 8-mile climb before the sun drops.
From Hilo, the VIS is only 45 to 60 minutes away. You can leave as late as 2:00 PM and still catch sunset, making Hilo the most convenient base for a summit trip. From Waimea, the drive is even shorter, about 30 to 40 minutes, which means you can enjoy a relaxed morning and still arrive with plenty of daylight.
Turn-by-Turn Directions to the VIS
From Hilo, take Highway 200, the Saddle Road, west for roughly 40 miles. The road is paved and well-maintained, but it climbs steadily through lava fields and high-elevation grasslands. Watch for the clearly marked Mauna Kea Access Road on your right. Turn there and follow the paved road up to the VIS.
From Kona, take Highway 190 north toward Waimea, then connect to Highway 19 east, and finally merge onto Highway 200. Follow the signs to the Mauna Kea Access Road. The VIS is at GPS coordinates 19.7590 degrees north, 155.4560 degrees west. Download offline maps before you leave. Cell service disappears well before you reach the VIS, and you do not want to rely on a signal that will not be there.
The Critical Acclimation Stop (30-Minute Minimum)
You must spend at least 30 minutes at the VIS before ascending further. This is not a suggestion. It is a rule enforced by rangers, and it is the single most effective way to reduce your risk of altitude sickness. Your body needs time to adjust to 9,200 feet before you push it another 4,600 feet higher.
Use this time intentionally. Walk around slowly. Drink water, at least 16 ounces per person. Use the restroom. Check your tire pressure, because the temperature drop affects it. Rangers may ask how long you have been there, and they will turn you back if you have not done the full 30 minutes. Do not lie. Altitude sickness is real, and it can escalate quickly.
The Final 8 Miles: What to Expect
The first 2 miles past the VIS are paved. After that, the road turns to unpaved, single-lane gravel with pullouts for passing. The speed limit is 25 miles per hour, and you should treat that as a maximum, not a target. Drive slower if visibility is poor, if dust from another vehicle reduces your sight lines, or if you simply feel uncomfortable.
There are no guardrails on many sections of this road. The drop-offs are real, and if you have a fear of heights, the passenger seat can be a very difficult place to sit. One traveler documented a full anxiety attack, hyperventilating and crying, while her partner drove. If you are prone to this kind of fear, consider being the driver. Controlling the speed and the line gives you a sense of agency that the passenger seat cannot offer.
Also, watch for the yellow warning signs depicting cows. These are not decorative. Cattle roam freely on Mauna Kea, and hitting a 1,200-pound animal on a single-lane gravel road at elevation is a scenario you want to avoid. The "invisible cows" joke among locals is only funny until you round a blind corner and find one standing in the middle of the road.
Altitude Sickness: Symptoms, Prevention, and When to Turn Back
Who Is Most at Risk?
Children under 13 are strongly discouraged from going past the VIS. The risk of permanent bodily damage from high altitude is real for developing bodies, and no sunset photo is worth that. People with respiratory or heart conditions should consult a doctor before attempting the summit. But even if you are young, fit, and healthy, you are not immune. Altitude sickness does not care about your marathon time or your gym routine. It cares about how your body responds to 40 percent less oxygen.
Recognizing the Symptoms (Headache, Nausea, Dizziness)
Mild symptoms include headache, fatigue, shortness of breath, and loss of appetite. These are common and can often be managed by slowing down and hydrating. Severe symptoms are a different category entirely. Confusion, loss of coordination, vomiting, and blue lips or fingernails indicate that your body is in trouble. The golden rule on Mauna Kea is simple. If you feel unwell, descend immediately. The only cure for altitude sickness is lower elevation. Waiting it out at the summit does not work. It gets worse, not better.
Prevention Strategies That Actually Work
Hydration starts the morning of your drive. Aim for 16.9 ounces of water per person per hour, and do not wait until you are thirsty to drink. Avoid alcohol, smoking, and sleeping pills for at least 24 hours before and during your trip. These substances depress your respiratory system and make it harder for your body to adapt to thin air.
The 30-minute VIS stop is mandatory for a reason. Do not skip it, and do not rush it. Ascend slowly once you leave the VIS, and if anyone in your group starts feeling unwell, turn around. Finally, do not plan to sleep at elevation. Descend to sea level after your visit. Kona, Hilo, and Waimea all sit low enough for your body to recover overnight.
What to Pack for the Mauna Kea Summit Drive
Clothing: Layers Are Non-Negotiable
The temperature difference between the beach and the summit can be 50 degrees or more. Even in July, summit temperatures can drop to 37 degrees Fahrenheit. In winter, freezing temperatures and snow are common. Dress in layers. Start with a moisture-wicking base layer against your skin. Add a mid layer of fleece or down for insulation. Top it with a windproof and waterproof outer shell. Bring a hat, gloves, and a warm jacket for every person in the car. You will not regret it.
Safety and Emergency Gear
Bring a flashlight or headlamp. The summit closes 30 minutes after sunset, and you will likely be driving down in the dark. Pack extra water and high-calorie snacks like trail mix or granola bars. A first aid kit belongs in every rental car, and if your doctor has prescribed acetazolamide, commonly known as Diamox, for altitude sickness, take it as directed. Bring a phone charger or power bank. Cold temperatures drain batteries faster than you expect.
Photography and Comfort Items
Sunglasses and sunscreen are essential. UV exposure intensifies at high altitude, and you will burn faster than you think. Bring a camera with extra batteries, because the cold will shorten battery life. If you plan to stay for stargazing after sunset, binoculars are a lightweight alternative to a telescope. The designated stargazing area, known as Park 2, sits below the summit and offers dark skies without the summit closure pressure.
Rules, Regulations, and Cultural Respect
Summit Access Hours: Don't Get Locked Out
The summit area closes to visitors 30 minutes after sunset and reopens 30 minutes before sunrise. Rangers enforce this strictly. Plan to be back at your car and heading down before the closure time. If you linger too long, you will be asked to leave, and the experience will end on a sour note.
What Is Prohibited (The Full List)
Drones are not allowed. Pets are not allowed, with the exception of service animals. Camping, alcohol, and smoking are all prohibited. Radio and cellphone use above the VIS is restricted to emergencies only, because signals can interfere with the sensitive equipment at the observatories. These rules exist to protect both the scientific work being done on the mountain and the safety of every visitor.
The Sacred Significance of Mauna Kea
Mauna Kea is not just a volcano. It is the most sacred mountain in Native Hawaiian culture, considered the piko, the umbilical cord, connecting the islands to the heavens. The summit is a burial site for high-ranking chiefs and a place of profound spiritual significance. This is not a detail to gloss over on your way to a photo op. It is the context that makes the mountain what it is.
When you visit, stay on designated paths. Do not remove rocks, do not disturb artifacts, and do not treat the summit like a playground. Speak quietly. Acknowledge the land you are standing on. Treat Mauna Kea with the same reverence you would a church or a cemetery, because for many, that is exactly what it is. This is a living cultural site, not just a tourist attraction, and your visit should reflect that understanding.
Self-Drive vs. Guided Tour: Which Is Right for You?
The Case for Self-Driving
Driving yourself to the summit costs less. You pay for gas and your rental car, and that is it. You control the timeline, the stops, and how long you stay at each viewpoint. For confident drivers, small groups, and anyone who wants a private experience, self-driving is the most rewarding option. It feels like an accomplishment, and it is.
The Case for Booking a Tour
Guided tours remove every logistical headache. You do not navigate, you do not worry about rental car restrictions, and you do not white-knuckle the steering wheel on a single-lane gravel road. Tours typically include dinner, warm jackets, and professional telescopes for stargazing after sunset. They last 6.5 to 8 hours and consistently earn ratings around 4.8 stars. For solo travelers, anyone with a fear of heights, or people who simply want to relax and enjoy the view, a tour is worth every dollar.
The "Hitchhiking Hack"
There is a third option that sits between self-driving and a tour. You can drive a 2WD vehicle or a rental car that is not summit-approved to the VIS, park there, and hitchhike the final 8 miles with someone who has a 4WD. Parking at the VIS is limited to 115 spots on a first-come, first-served basis, so arrive early. If you go this route, exchange phone numbers with the driver and note their license plate. This is not an officially endorsed practice, and it depends entirely on finding a willing driver. Use it at your own risk, but know that it exists.
Seasonal Guide: Best Months to Drive to Mauna Kea Summit
Summer (May through October): Most Predictable Weather
Summer offers the most reliable conditions for a summit trip. Skies tend to be clear, wind is lower, and temperatures, while still cold at the summit, are more manageable. Your odds of catching a clean sunset without cloud cover are highest during these months. Crowds peak in July and August, so expect company at the VIS and on the summit road.
Winter (November through April): Snow and Road Closures
Snow is possible on Mauna Kea at any time, but it is most common from December through March. The summit road can close without warning due to ice or snow accumulation. Before you leave, call the road conditions hotline at (808) 935-6268. Rangers may close the road even if conditions look fine from sea level. Winter crowds are thinner, but the unpredictability means you need a backup plan.
Time of Day: Sunrise vs. Sunset
Sunset is the most popular option for good reason. Temperatures are warmer, the golden hour light is spectacular, and you can stay for stargazing after the sun goes down. Sunrise requires a very early departure. From Kona, you would need to leave by 3:00 AM and drive the Saddle Road in the dark. Both options demand the same preparation. The only difference is your alarm clock.
Frequently Asked Questions About Driving to Mauna Kea Summit
How hard is the drive to Mauna Kea Summit? It is moderately difficult. The steep, unpaved, single-lane road and the effects of altitude make it more challenging than any paved road in Hawaii. Most drivers with 4WD experience find it manageable at 25 miles per hour or less.
Is it safe to drive to Mauna Kea Summit? Yes, if you follow the rules. Use 4LO for the descent, stay under the speed limit, complete the 30-minute acclimation stop at the VIS, and turn back immediately if you or anyone in your group feels sick. The ranger emergency number is (808) 961-2180.
Can the public drive to the top of Mauna Kea? Yes, but only with a 4WD or AWD vehicle and only during daylight hours. The summit closes 30 minutes after sunset and reopens 30 minutes before sunrise.
Do I need a permit to drive to the summit? No permit is required for self-driving. Tour operators handle their own permits and logistics.
What happens if my rental car breaks down? Call the ranger emergency number. Do not attempt to hike down from the summit. The altitude, distance, and terrain make that dangerous. Stay with your vehicle and wait for assistance.
Driving to Mauna Kea summit is one of the most extraordinary experiences available on the Big Island. It is also one of the most demanding. The mountain does not care about your itinerary, your rental car reservation, or your Instagram plans. It cares about preparation, respect, and humility. If you bring those three things, along with a full tank of gas and a working 4WD, you will have an experience that stays with you long after you descend back to sea level.
